We are always happy to answer any questions you may have.
Call us on 1300 848 302
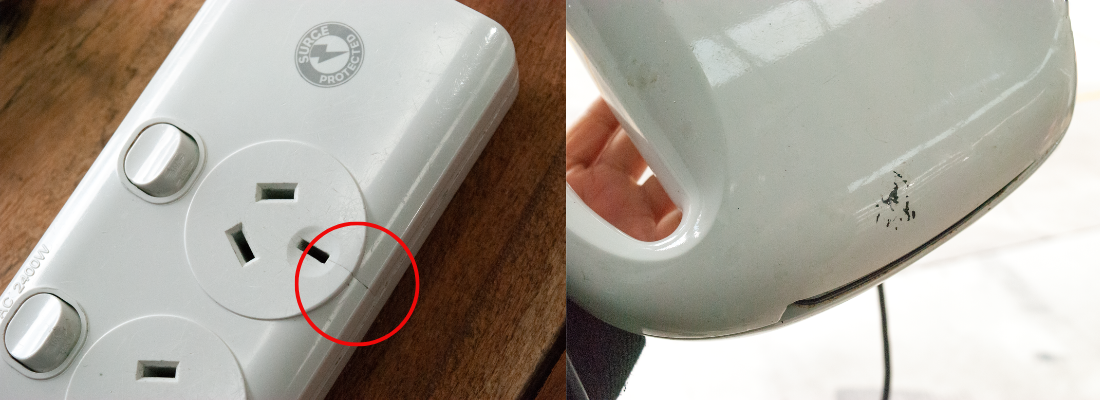
When testing and tagging, the first step always involves visually inspecting the electrical appliance. This is easily the most important step of the entire process.
This is because experience has proven that more than 90% of defects can be detected by a visual inspection. This means a whole lot of appliances are failing right at the beginning and don’t even make it to the electrical testing part which follows the visual inspection.
As such, it is necessary to always visually inspect and physically check the electrical appliance you’re checking, you’ll be amazed at what you find.
Here are some of the most important tips from our test and tag experts with decades of experience on what to keep an eye out for when conducting a visual Inspection.
.png)
.png)

All right, now that you've finished your visual inspection of the equipment, let's move on to the testing device itself. First off, you need to determine whether the device falls into the category of class 1 (earth appliance) or class 2 (double insulated). Don't make assumptions just by looking at the 3-pin configuration. Sometimes, that extra earth pin might be there for stability rather than actual functionality.
To properly determine the class, you might need to dig a little deeper. Take a closer look at the device and see if you can find any indications or labels that specify its class. Keep in mind that some devices, especially those that are completely shrouded in plastic and have no external metal components, tend to fall into the class 2 category and should be indicated with a square within a square symbol.
However, if you're unsure about how to test the device or determine its class, it's always a good idea to reach out to the manufacturer for guidance. If you did your test and tag training through us or had purchased your tester from Appliance Testing Supplies, you can of course use our lifetime support services. Feel free to contact us anytime for assistance.
For the Class 1 test, check the device for its earth continuity and make sure to establish a solid connection, as if there is an electrical fault, electricity will follow path of least resistance. Sometimes, you may need to scratch the surface of the device to gain access to the metal components that are necessary for a reliable earth connection. However, please note that devices coated with Teflon or painted surfaces may require a bit more effort to get to the metal parts. Be careful and make sure to not damage the device.
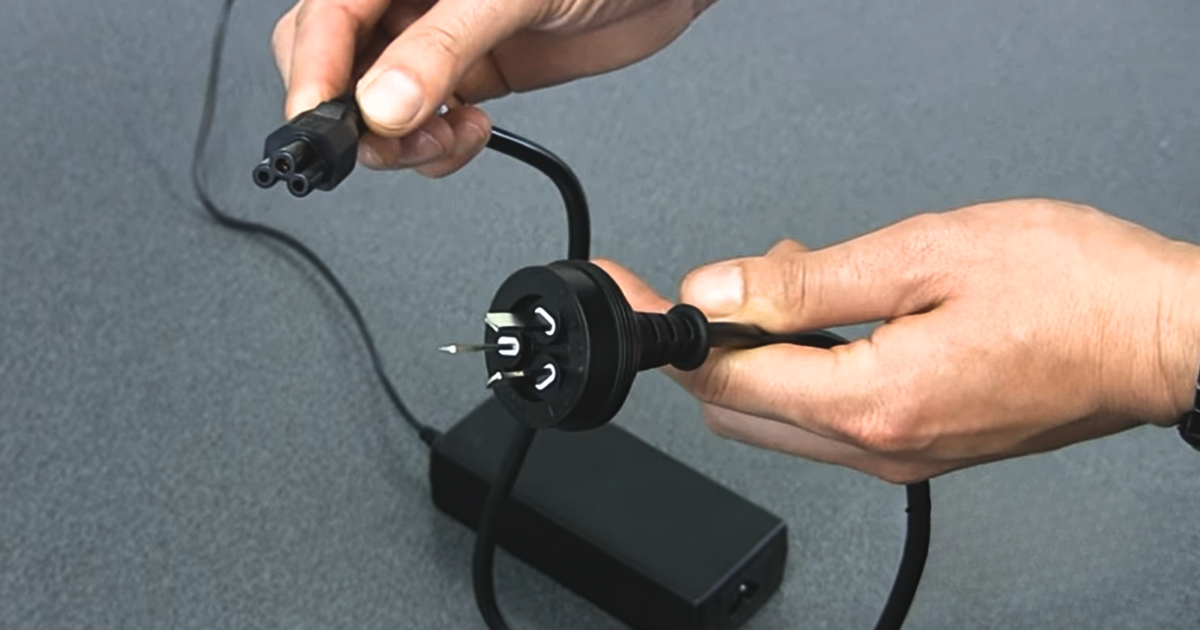
It's worth mentioning that certain power supply leads for laptops or other devices, which are connected by a clover leaf-shaped connection, might have an encapsulated earth. This means you might struggle to find an obvious earthing point since the earth connection is enclosed within the device itself. A Class 2 leakage test is recommended in this situation.
Lastly, if the power supply lead is removable (with an IEC connection), it must be tested separately from the device. Each component needs to be tested individually to ensure the safety and reliability of the equipment.
Remember, if you encounter any doubts or uncertainties during the testing process, it's always a good idea to seek guidance from the manufacturer or consult a professional in the field. Electrical safety is crucial, so it's better to be safe than sorry!
To sum it all up, here is a quick summary: